Make Your Own Spanish Guitar - online book
Complete plans & Instruction on how make your own Spanish Guitar.
| Share page | Visit Us On FB |
|
21 |
|||
|
|
|||
 |
|||
|
|
|||
|
depth of the mould plus the thickness of the guitar back.
In use the clips are placed in position and then two previously-prepared wedges (as shown in Fig. 21) are used to tighten them. (See Fig. 22.)
As the glueing of the back to the sides is quite a "major" operation it will be wise to see that everything needed for the job is at hand before starting it.
Your requirments will be: a pot of very hot not-too-thick glue; a small clean glueing brush; a thin steel knife blade (an old table knife will do); two long-tongued G cramps with an opening of 4" or more; and at least two dozen of the prepared clips (men�tioned above) and four dozen of the small wooden wedges.
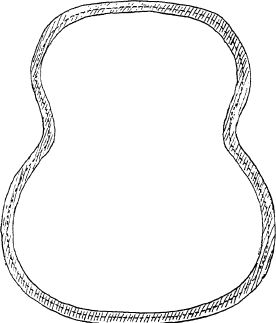
You will also need a "glueing frame" and this is illustrated in Fig. 23.
This can be cut from thick cardboard, 3-ply wood or even hardboard. The shape of the guitar is marked on the material (using the guitar mould as a template) and then it is cut to shape by allowing about 1/2"' each side of the outline of the guitar. |
 |
||
|
Fig. 23.�"Glueing Frame" for use when fixing
back and front of the guitar to the sides. This frame
is made from hard cardboard, 3-ply wood or
hardboard. |
|||
|
|
|||